

Clause library
Save the clauses you reuse, find them by name or tag, and put them into any contract as they are or adapted to it.
The Clauses screen is your own clause library. Save a clause once, then insert it into any contract, either word for word or adapted to that contract by the assistant.
The library is yours alone. Other people in your firm do not see your clauses, and you can save up to 200.
To open it, click the ≡ button and choose Clauses.
Save a clause from the document
- In Word, select the clause you want to keep.
- In the pane, click Save clause. The form opens with the selected text in Clause text and a suggested name.
- Change the Name if you want, and add Tags separated by commas, such as
confidentiality, mutual. - Click Save.
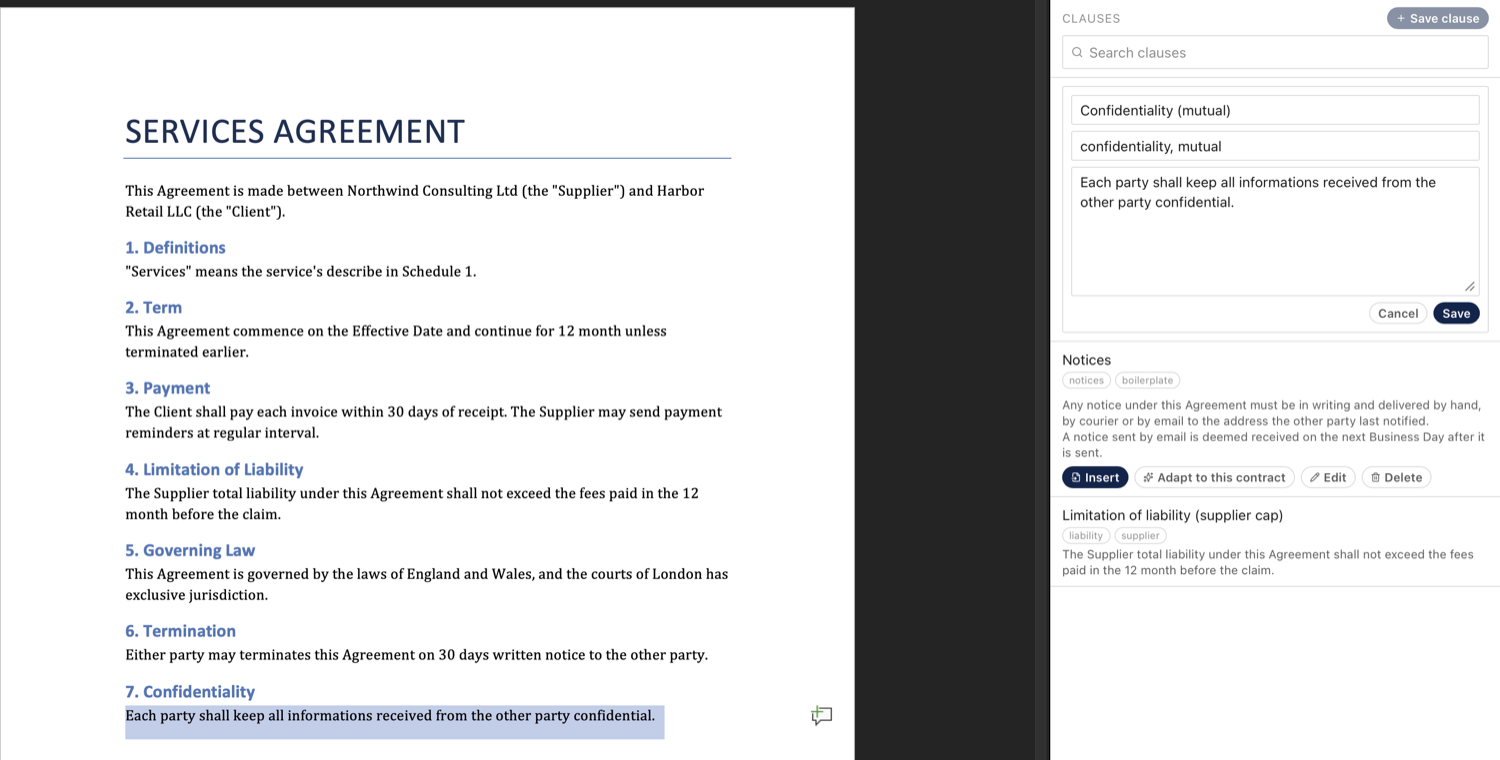
To add a clause that is not in the document, click Save clause with nothing selected. The form opens empty, and you can type or paste the text.
A clause can hold up to 10,000 characters and 10 tags.
Ask the assistant to save a clause
You can also ask in chat, in any mode. For example:
- "Save clause 5 to my clause library."
- "Save the indemnity clause as a supplier-friendly indemnity."
The assistant reads the clause and shows a Save to clause library card with a name, tags and the clause text. Nothing is saved yet.
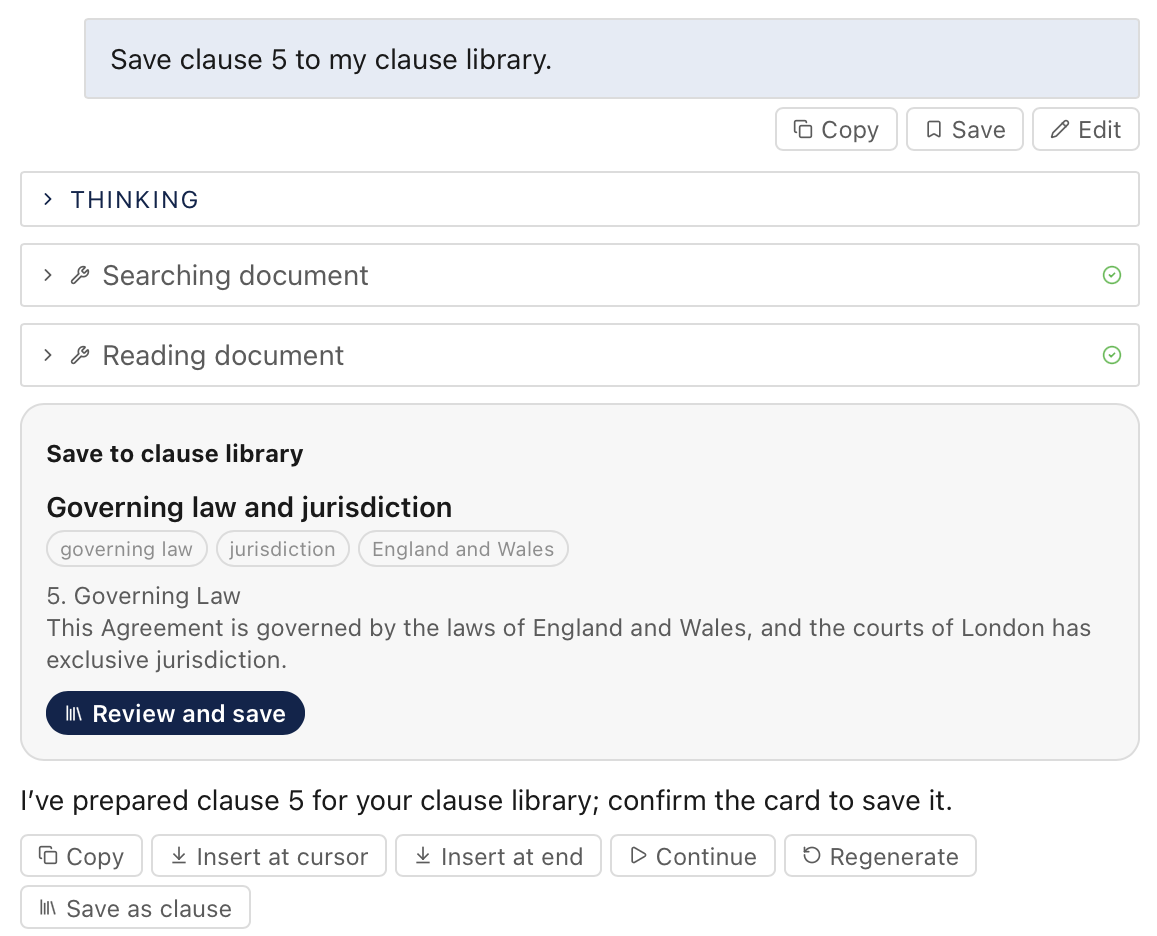
- Click Review and save on the card. The Clauses screen opens with the form filled in.
- Change the name, tags or text if you want.
- Click Save.
To keep a clause the assistant has just drafted, click Save as clause under its answer. The assistant picks the clause out of its answer, without the comments around it, and shows the same card.
Find a clause
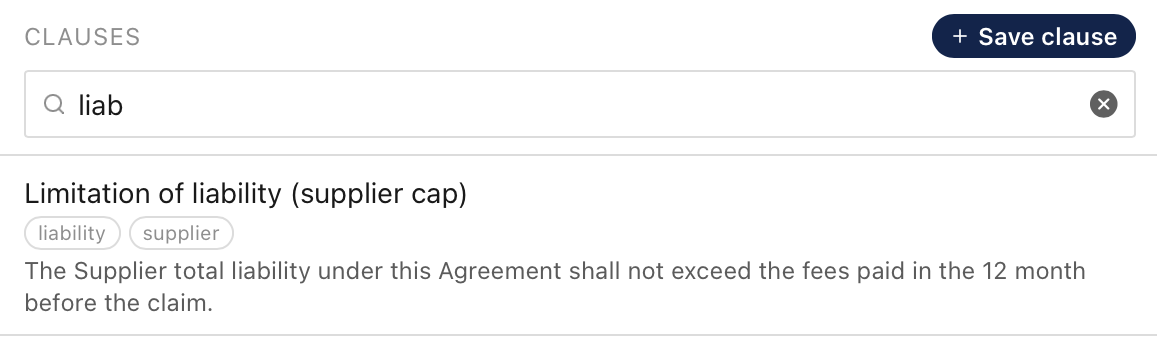
Type in Search clauses. The list narrows as you type, and it looks in the name, the tags and the text. With more than one word, a clause must contain every word.
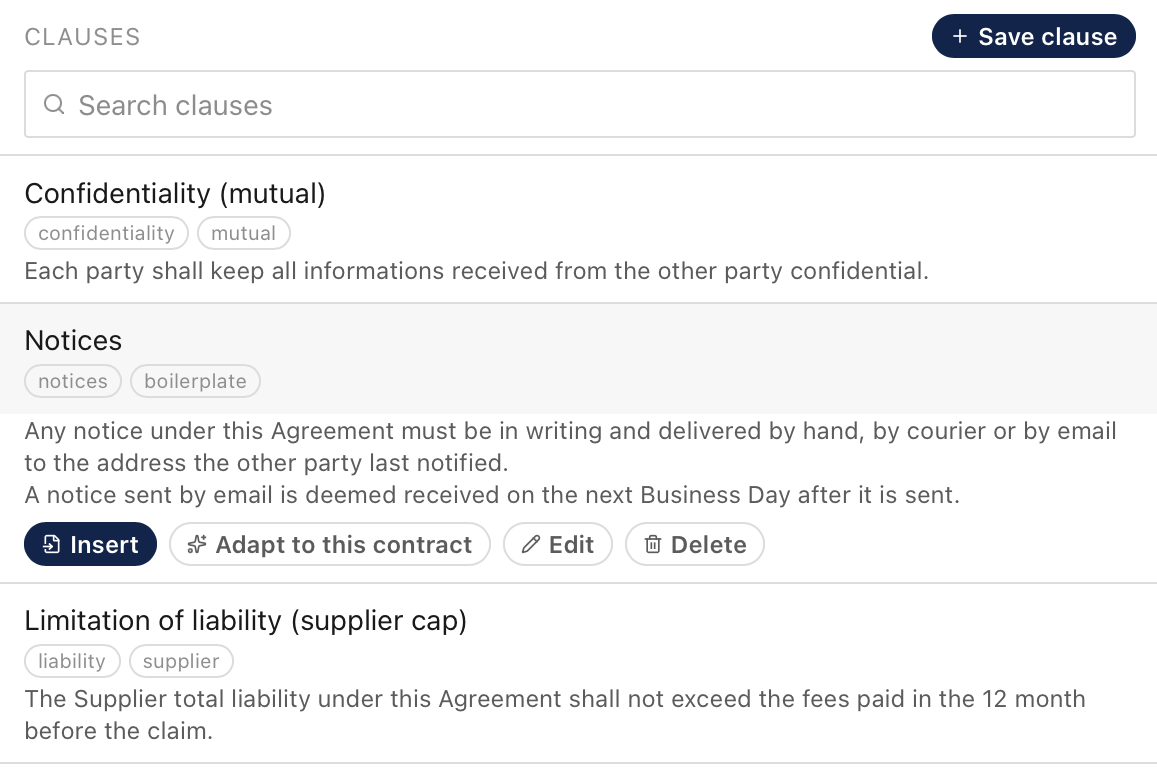
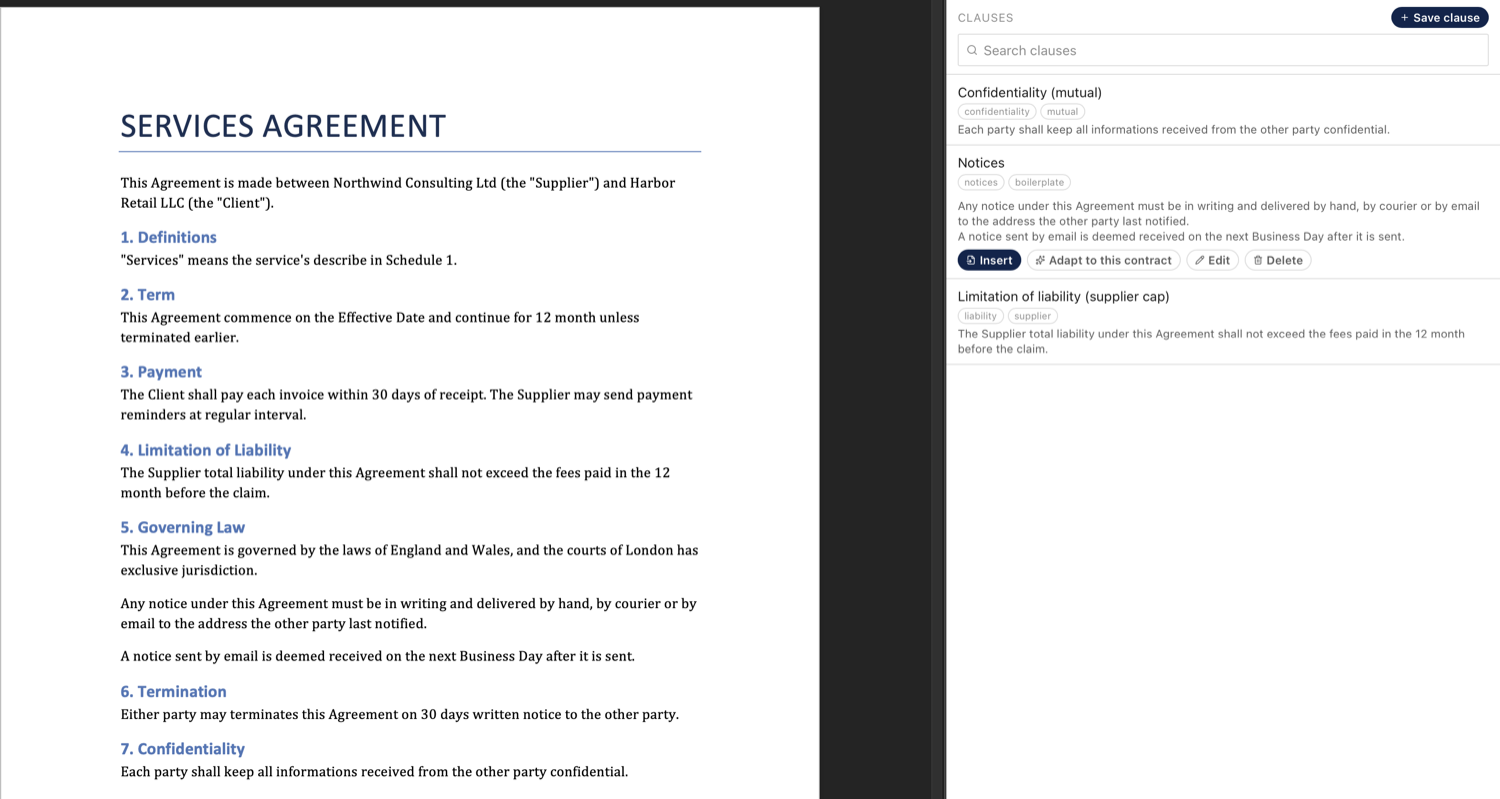
Click a clause to open it. You see the full text and four buttons: Insert, Adapt to this contract, Edit and Delete.
Insert a clause as it is
- In Word, click in the paragraph that the clause should follow.
- In the pane, open the clause and click Insert.
The clause goes in as new paragraphs after that paragraph, word for word. Each line of the clause becomes one paragraph.
Things to know:
- Nothing is replaced. If you have text selected, it stays, and the clause goes after its paragraph.
- Track Changes stays as it is. The clause is a tracked insertion only if Track Changes is already on.
- Formatting comes from the paragraph before it. Add the clause number or heading yourself.
- In a table, the clause goes after the table, not into the cell.
Adapt a clause to the contract
Use this when the saved wording does not fit the open contract as it is, for example when it uses different party names or defined terms.
- Optional: in Word, click where the clause should go.
- In the pane, open the clause and click Adapt to this contract.
The pane switches to a Redline chat and sends the clause to the assistant. The assistant may first ask which party you act for. It then proposes the clause as a redline, changed to use this contract's party names, defined terms and numbering.
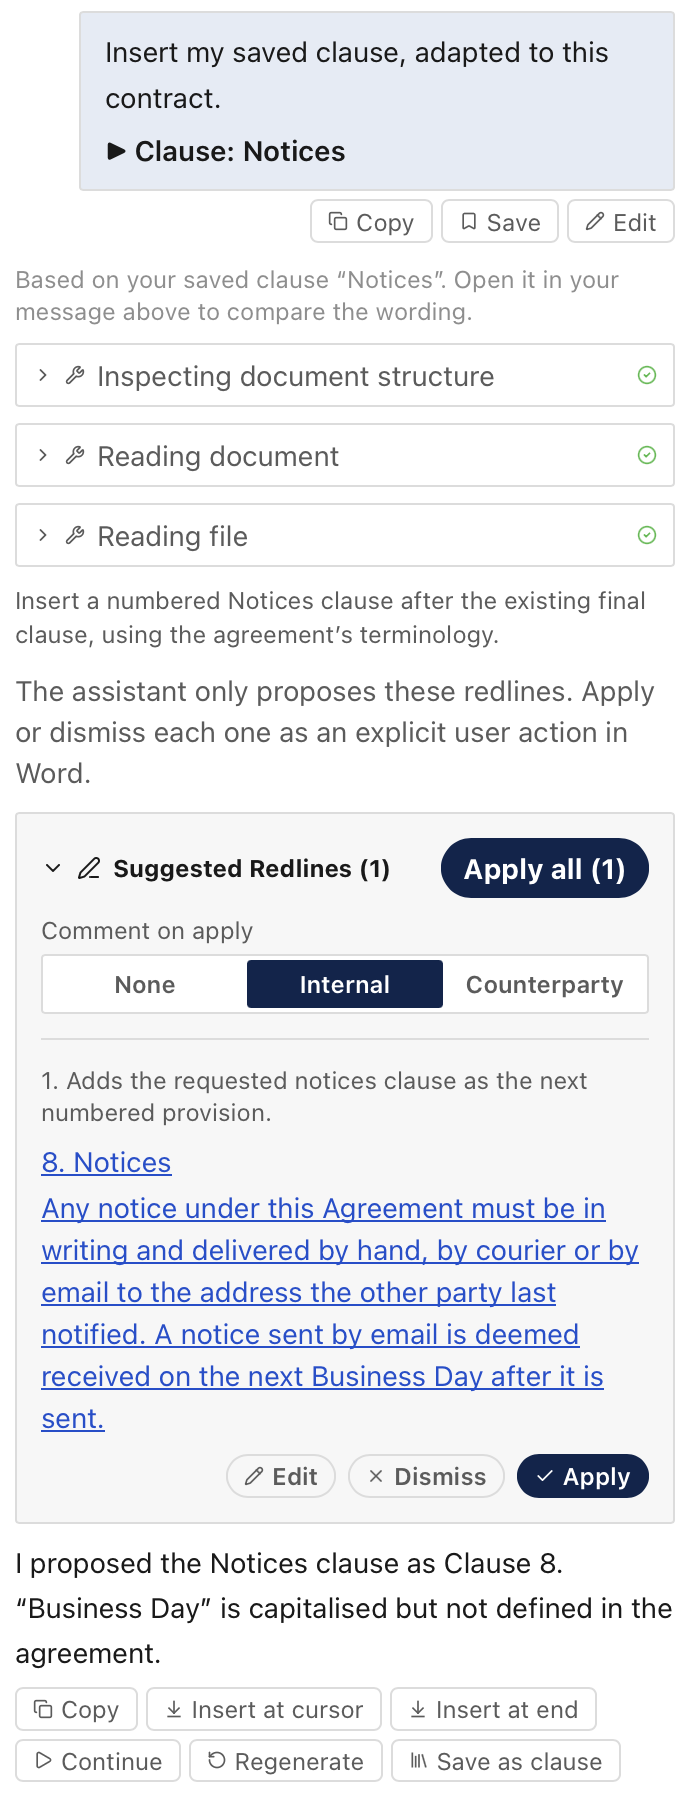
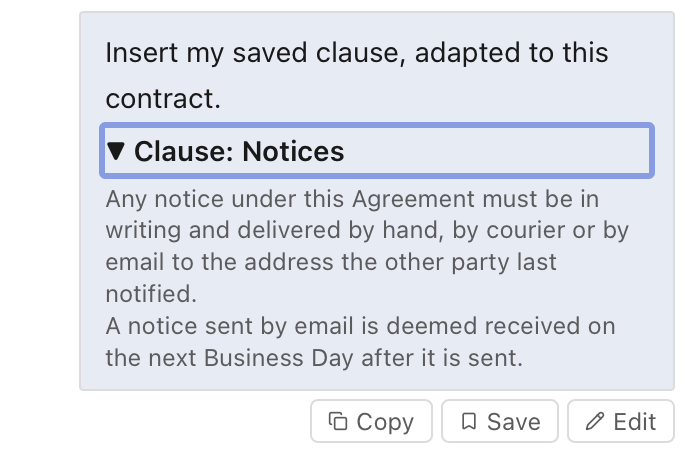
Your message shows as one short line with a Clause: row under it. Click that row to see the saved wording, and compare it with the redline before you apply it. The line above the assistant's answer names the saved clause it worked from.
The redline card works as in Redline mode: Apply, Edit or Dismiss each row. Nothing changes in Word until you click Apply.
If the clause uses a capitalised term that this contract does not define, the assistant says which one.
Edit or delete a clause
Open the clause, then:
- Click Edit to change the name, tags or text, and click Save.
- Click Delete, then Delete again to confirm. A deleted clause cannot be brought back.
Editing or deleting a clause in the library does not change any document it was inserted into.